Settings
The Settings API allows you to register a settings panel in the dashboard.
It can be used to allow Livestorm users to configure the plugin from the dashboard.
Many plugins require users to input some settings, for instance, your plugin might need:
- an API key or OAuth2 login flow to communicate with 3rd-party services
- text inputs to configure custom wordings to be displayed during the event
- color inputs to customize the visual of your plugin inside the room
- a switch input to enable/disable some features
- a payment form to activate your plugin
- etc.
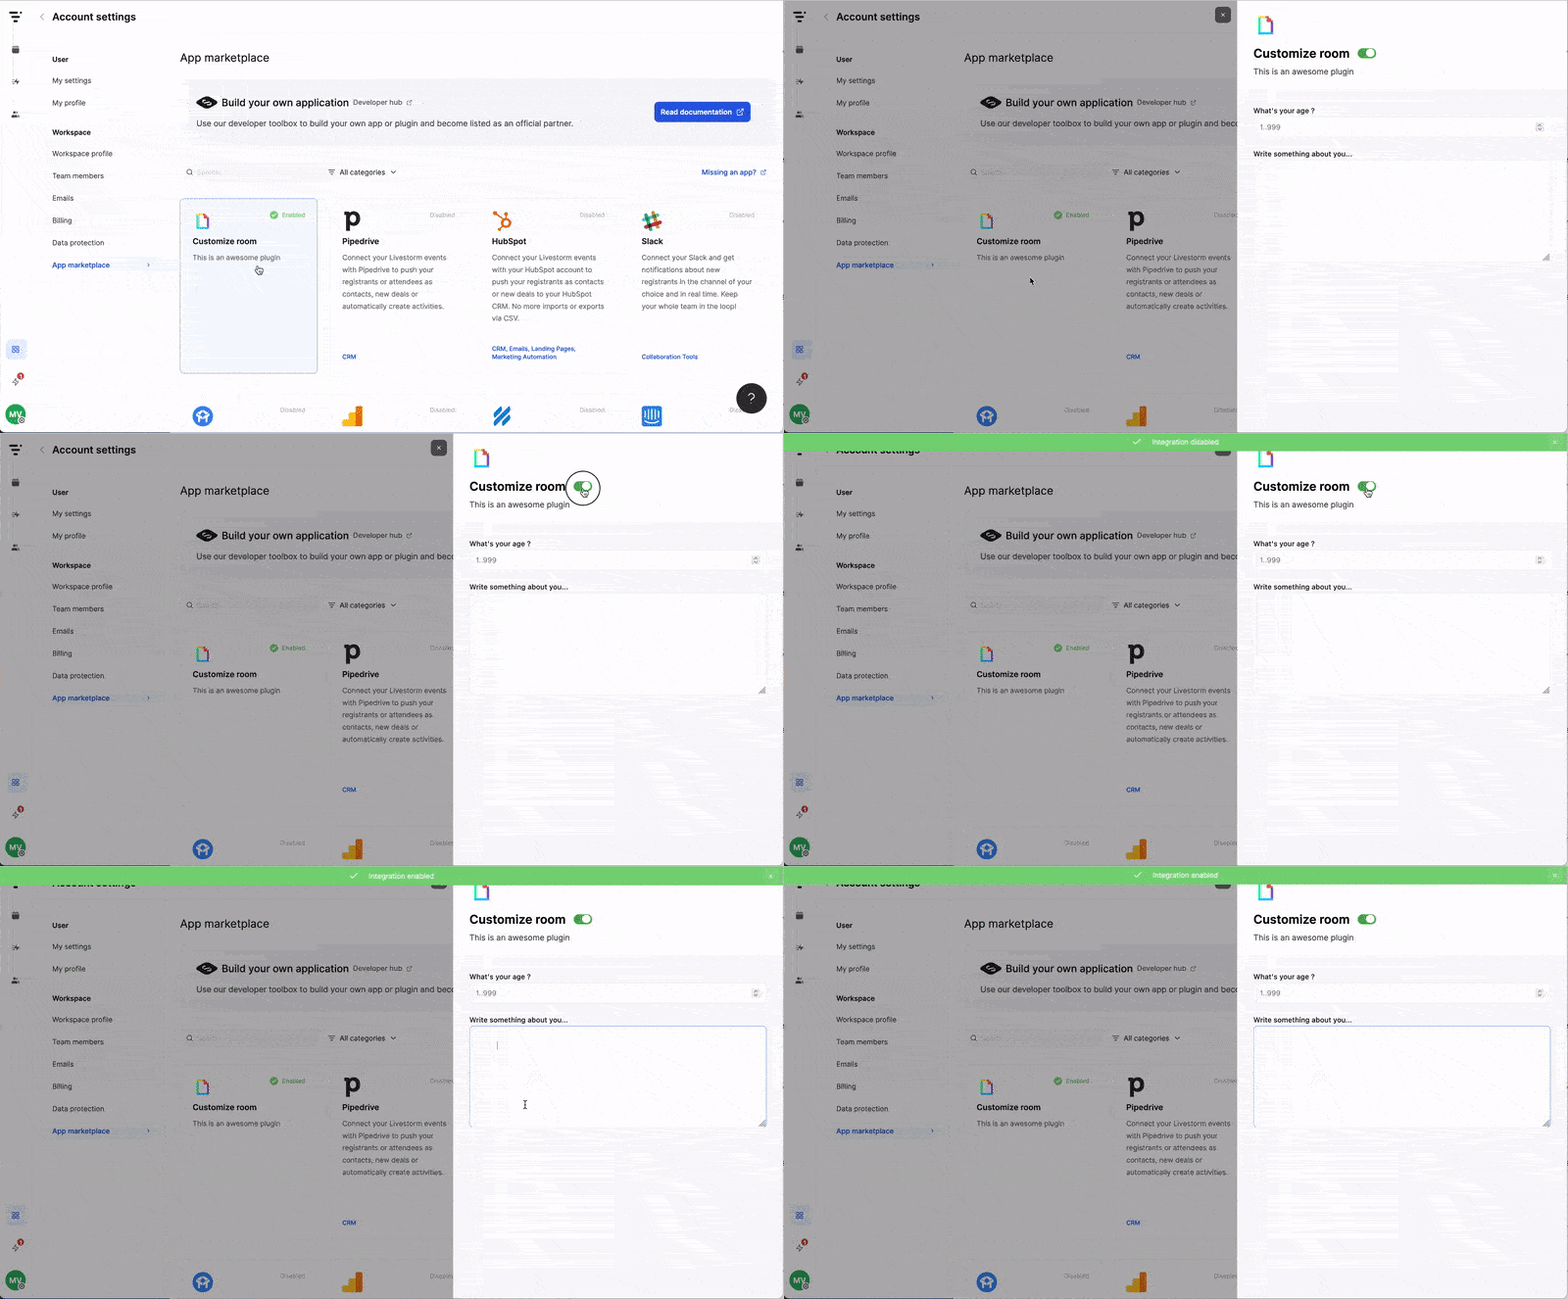
Here's a short video that explains how the Settings API works:
Check out the complete code example of the plugin shown in the above video on Github
To register a Settings menu, first declare another entry point in your app using the below API
Settings.register()
Settings.register()This is the call to load the Settings app. Add this to your index.ts at the root of your plugin.
usage:
// index.ts
import { Settings } from '@livestorm/plugin'
import SettingsApp from './src/SettingsApp'

Settings.register(SettingsApp)

// src/SettingsApp.ts
export default function () {
 // your Settings app
}
Once your app has registered settings using this method, you'll be able to declare a panel.
All of the below APIs must be called inside of a function registered using Settings.register(() => { ... })
Settings.Event.registerPanel()
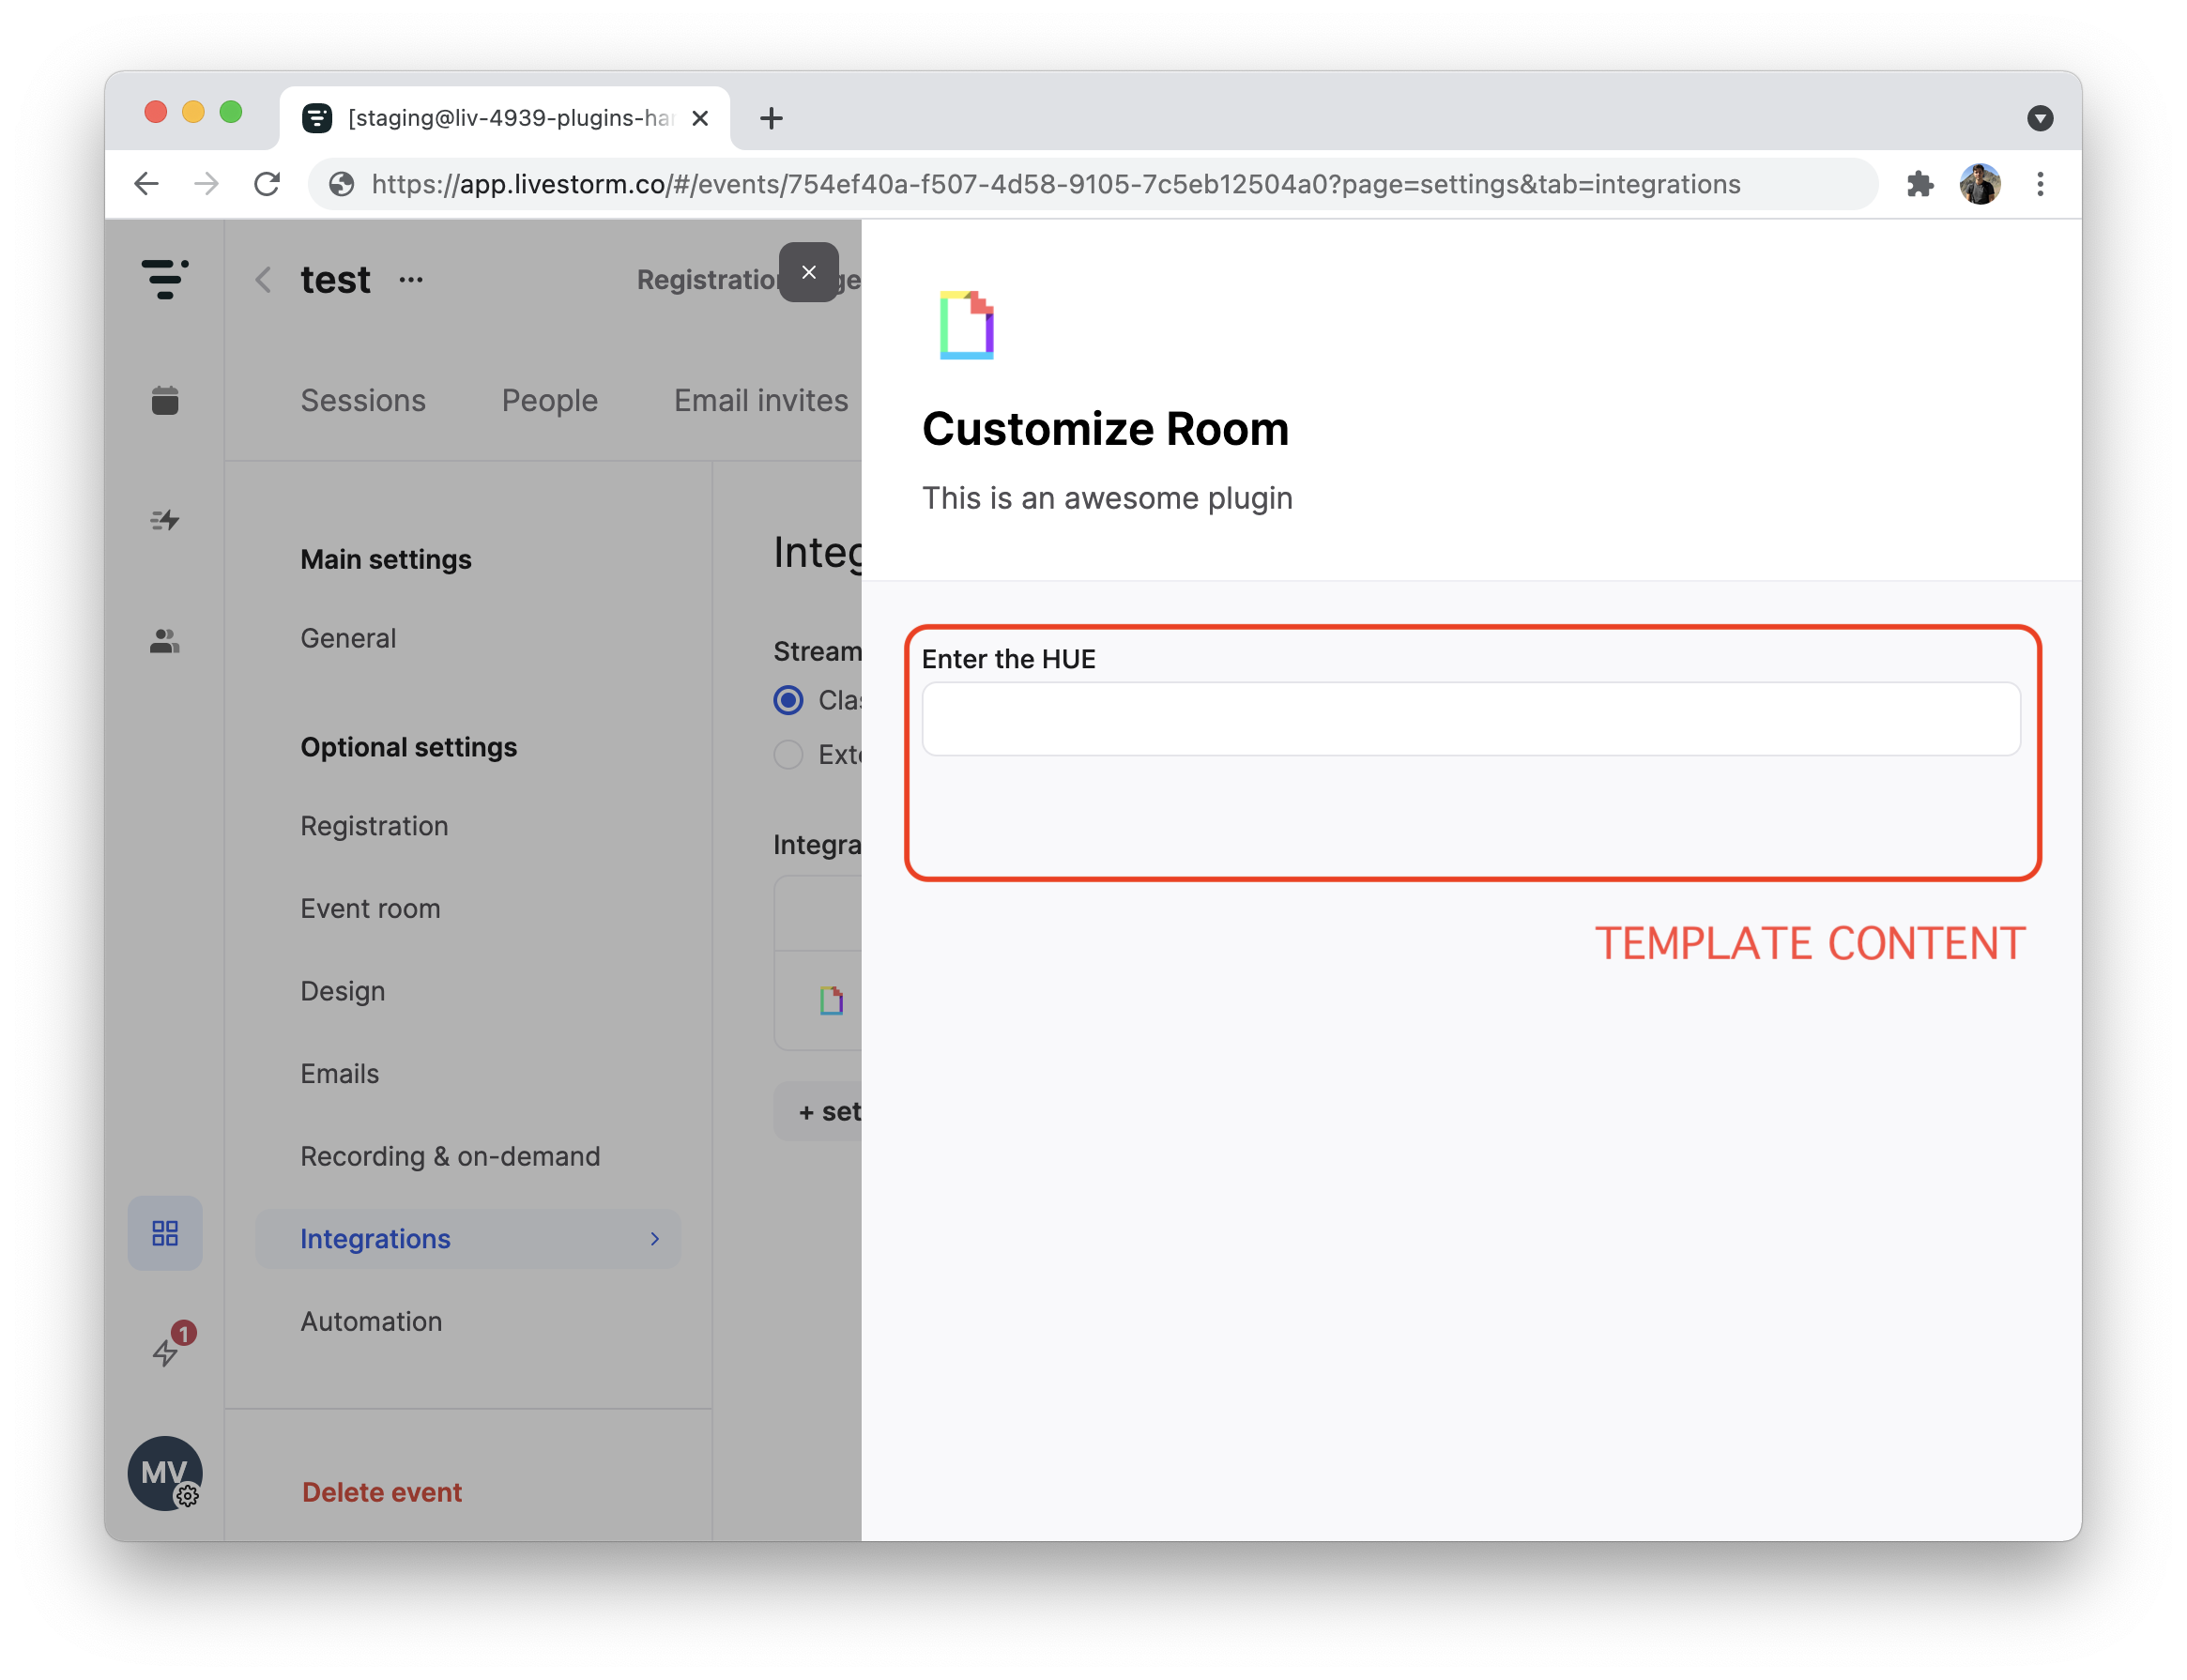
Settings.Event.registerPanel()This method allows to register a Settings panel within the settings of an Event.
Settings defined here should be applied to all the sessions of the Event.
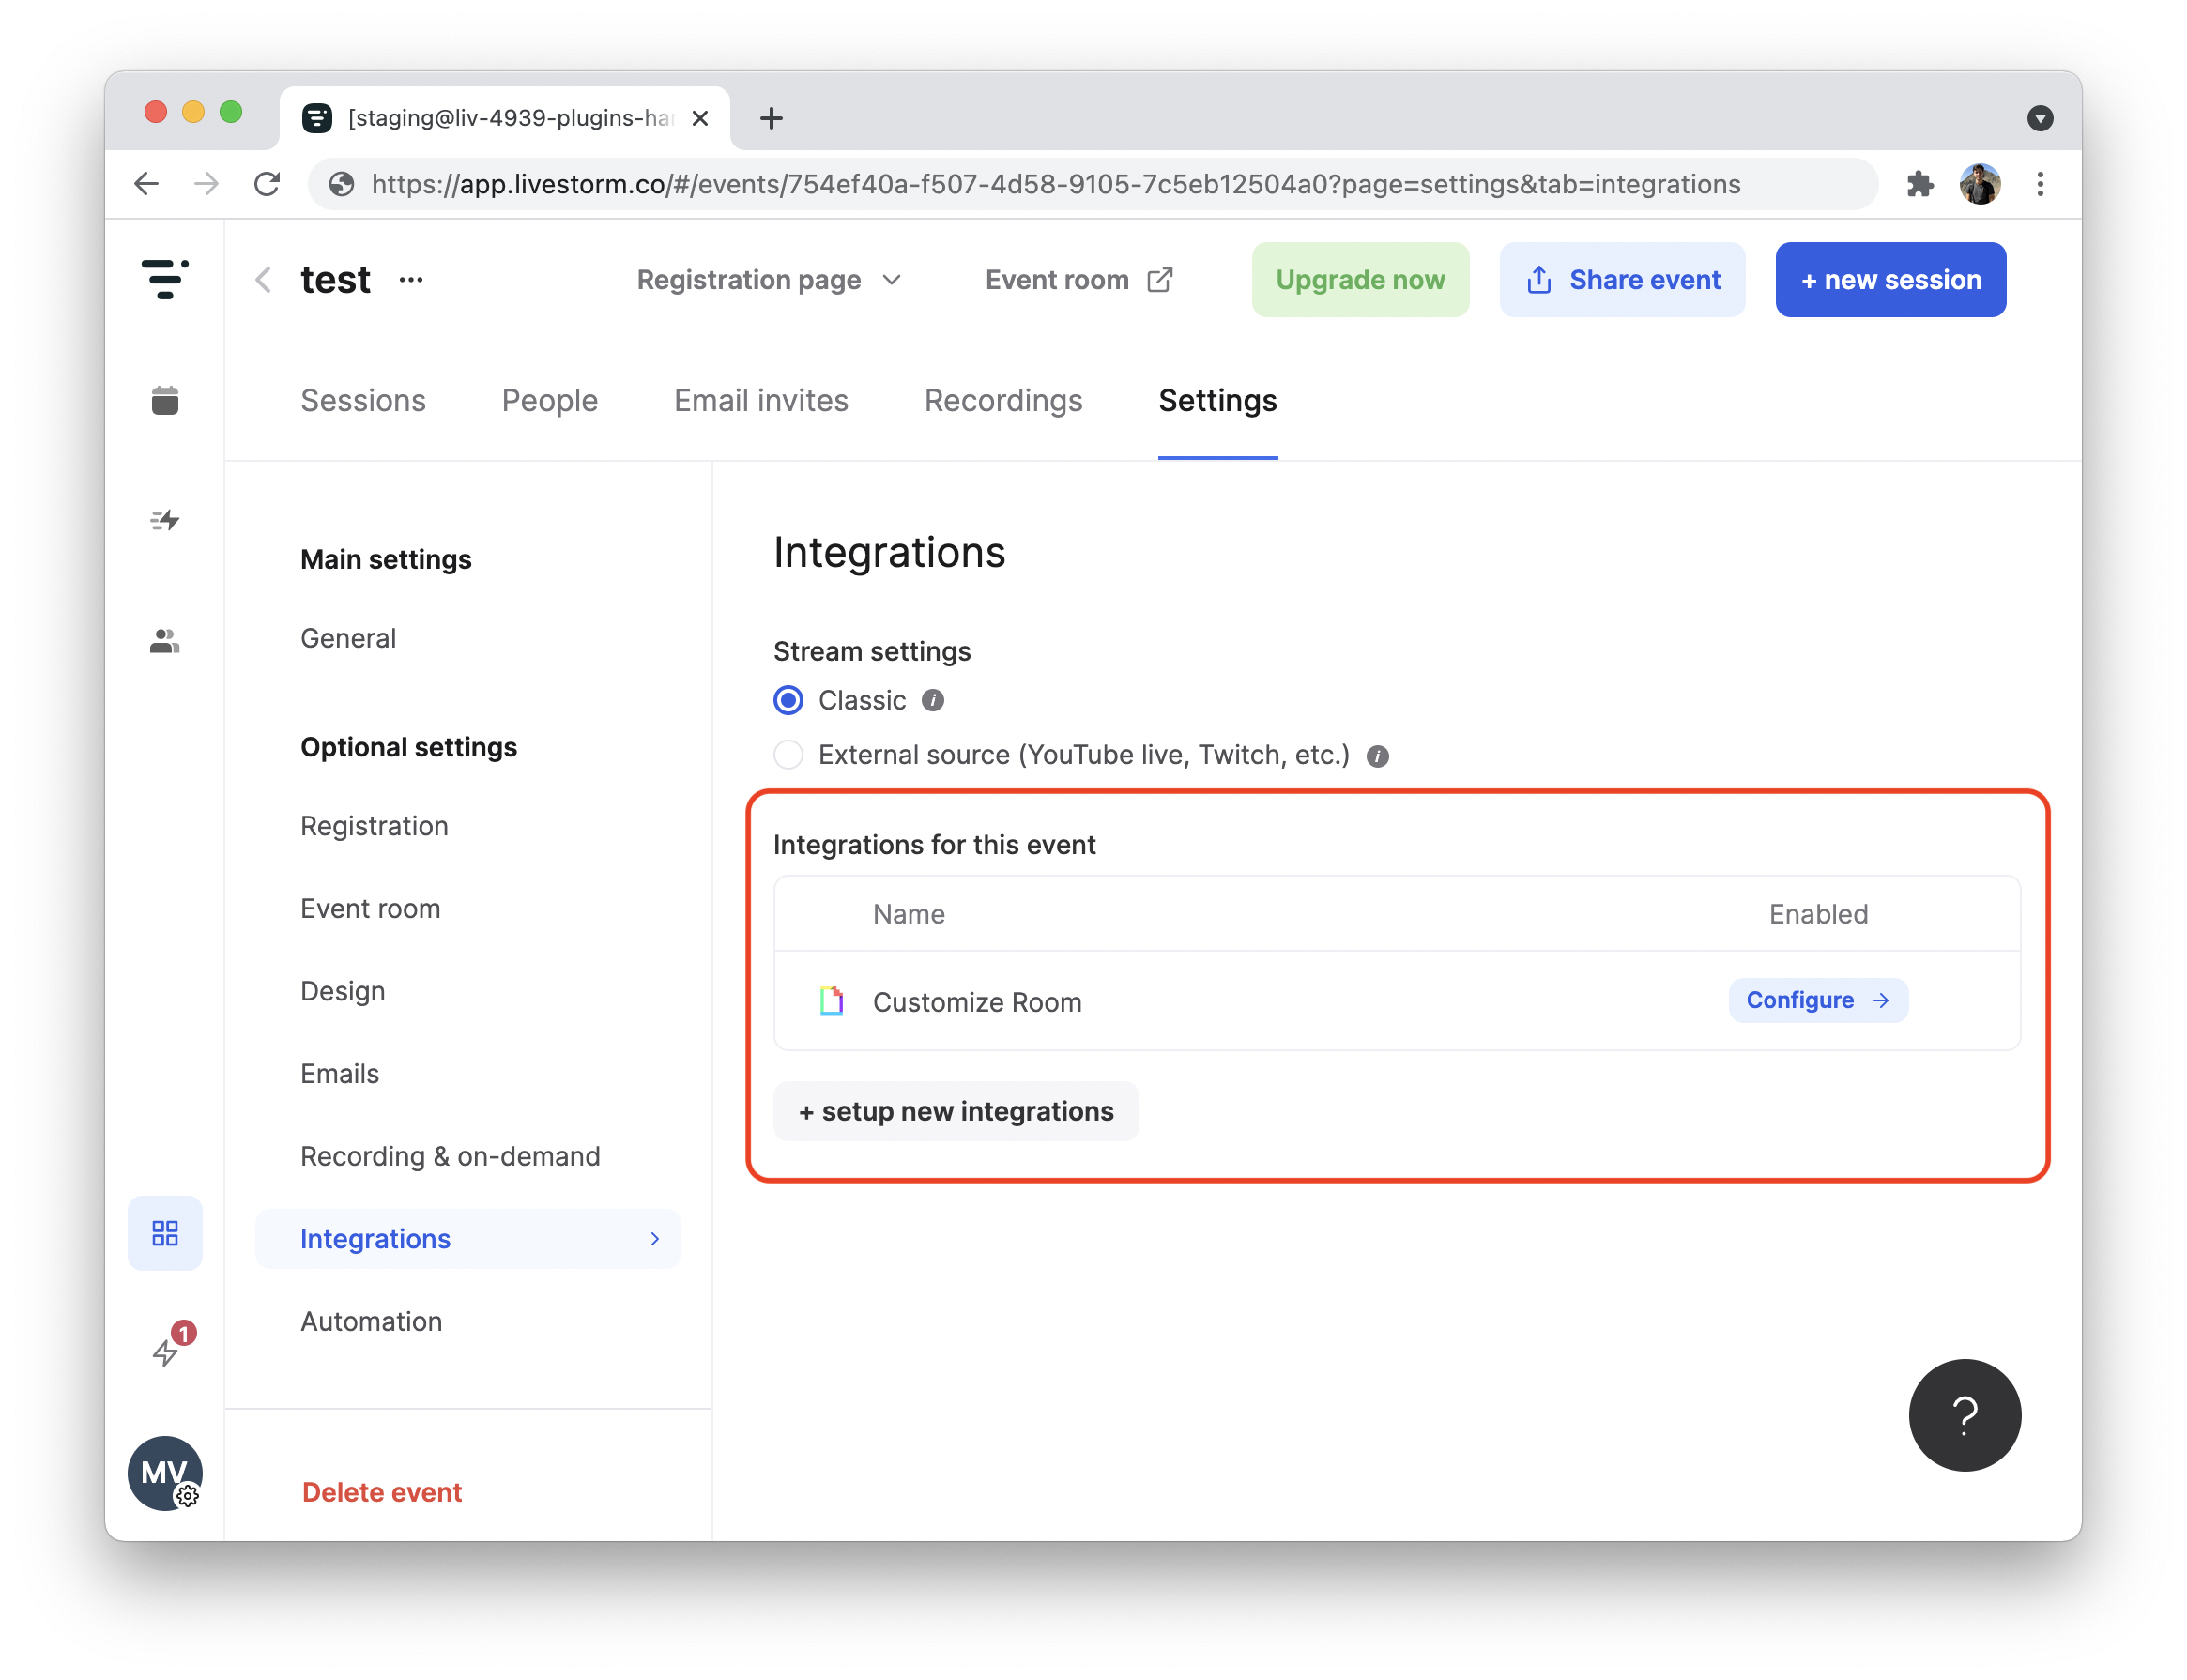
Once you publish a plugin that contains a call to this method, your plugin will appear within the settings of the events:

To add a Logo and a description to the Settings panel, you need to declare ametadataproperty in yourenvironments.jsonfile.The format should be as follow:
{
  "development": {
    "name": "custom-colors",
    "apiKey": "xxx",
    "metadata": {
      "logo": "https://xxx.png",
      "title": "Custom Colors",
      "description": {
        "en": "This is an awesome plugin",
        "fr": "Customize the room colors using this awesome plugin"
      }
    }
  }
Note that you can use the
livestorm assetcommand in order to upload your logo and obtain a reliable URL.
Clicking on Configure → opens up a Sidepane in which your template will be displayed.

usage:
Settings.Event.registerPanel({
  template,

  // Function called when your template uses `postMessage(params)`
  onMessage: async (params) => {

    /**
     *
     * Save the settings however you want, we recommend using the Storage API
     * to persist them and retrieve those settings in the Room.
     *
     */
    Storage.setItem('color', hue, {
        scope: 'event'
    })

    /**
     *
     * To apply settings on the fly in the room you can leverage the PubSub API
     * Simply subscribe to the same event in the room
     *
     */
    PubSub.publish('change-color', {
        data: {
            hue, saturation
        },
        scope: 'event'
    })
  }
})
This API is commonly used with the Storage API to persist settings, and the PubSub API to send them on the fly
We strongly recommend using the UI Kit to build your settings (fields, layouts, texts, etc.).
| Param | Type | Description |
|---|---|---|
| template | string | The HTML template to be displayed within the Sidepane |
| variables | Object | An object of variables to be used within your template |
| onMessage | Function | A callback called whenever your template uses the postMessage() function |
Settings.Organization.registerPanel()
Settings.Organization.registerPanel()This method allows to register a Settings panel within the marketplace directly.
Settings defined here should be applied to the entire organization.
Once you publish a plugin that contains a call to this method, your template will appear directly on the marketplace tile of your plugin :

To add a Logo and a description to the Settings panel, you need to declare ametadataproperty in yourenvironments.jsonfile.The format should be as follow:
{
  "development": {
    "name": "custom-colors",
    "apiKey": "xxx",
    "metadata": {
      "logo": "https://xxx.png",
      "title": {
          "en": "Custom Colors",
          "fr": "Custom Colors"
      },
      "description": {
        "en": "This is an awesome plugin",
        "fr": "Customize the room colors using this awesome plugin"
      }
    }
  }
Note that you can use the
livestorm assetcommand in order to upload your logo and obtain a reliable URL.
usage:
Settings.Organization.registerPanel({
  template,

  // Function called when your template uses `postMessage(params)`
  onMessage: async (params) => {

    /**
     *
     * Save the settings however you want, we recommend using the Storage API
     * to persist them and retrieve those settings in the Room.
     *
     */
    Storage.setItem('color', hue, {
        scope: 'organization'
    })

    /**
     *
     * To apply settings on the fly in the room you can leverage the PubSub API
     * Simply subscribe to the same event in the room
     *
     */
    PubSub.publish('change-color', {
        data: {
            hue, saturation
        },
        scope: 'organization'
    })
  }
})
We strongly recommend using the UI Kit to build your settings (fields, layouts, texts, etc.).
| Param | Type | Description |
|---|---|---|
| template | string | The HTML template to be displayed within the Sidepane |
| variables | Object | An object of variables to be used within your template |
| onMessage | Function | A callback called whenever your template uses the postMessage() function |
Updated 11 months ago